The Elephant’s Trunk Nebula

This summer’s target is the Elephant’s Trunk Nebula which is a small part of IC 1396, an emission nebula located in the Cepheus constellation.

IC1396 25-Jul-2021, RedCat 51, Optolong L-Extreme, 36x300sec (3 hours) Under a Full Moon

Equipment

To capture this target I am using the following setup:

  • Telescope: Williams Optics RedCat 51
  • Filter(s): Optolong L-Pro 2″ filter
  • Camera: ASI2600MC Pro
  • Mount/Star Tracker: Starwatcher Sky Adventure Pro
  • EAA: ASIAir Pro, ASI120MM Mini Guide Camera, f/4 mini guide scope, ZWO EAF

Observation Log

I live in a Bortle Class 7 area and image primarily from my backyard. I will attempt to get as much imaging time as possible with this target. The target coordinates are as follows:

  • RA: 21h 35m 37s
  • Dec: 57degrees 24′ 03″

Due to the hot summer nights, I am aiming only for about.

2021-07-17

Weather: Partly Cloudy

Imaging:
– 36x300s (25 rejects) ~ 3 hours
– 30x60s (1 reject)
– 10x120s rejected
– 1x600s rejected

Notes:
I had a lot of issues this night. I spent the majority of my time trying to figure out how to focus the telescope. The issue was that the 3D printed focus ring did not fully engage the belt, as a result I could not ever get focus. After those issues were sorted out, I was able to finally polar align and let the system run through the night. The clouds started rolling in late night, so there were not many usable images from this run.

2021-07-25

Weather: Partly Cloudy (late night)

Imaging:
– 36x300s (36 rejects) ~ 3 hours

Notes:
For this run, I had updated my ZWO EAF mount to a different design which worked much better. My focus was within 2″, which was better than I had ever achieved. The guiding was great an my RMS error was under 1″. I was able to image about 1h30 before I ran into a major issue with my autofocus routing. I had set up the autofocus to run about once every hour or every 2 degrees C in temperature change. A little over an hour in the auto-focus routine executed, and got extremely confused. I ended up losing about 30 minutes of imaging time before the clouds rolled in.

Processing:
Below is my first pass at processing the lights from this night. Overall the image is much sharper than the previous night but there are some areas I need to work on. Namely there seems to be an issue with the uneven background subtraction evident by the darker circular area to the mid right-side of the image.

2021-07-26

Weather: Expected Partly Cloudy

Imaging:

Notes:

This was the longest imaging run I had yet, but I had a few issues.

  1. The AZ lock on the mount, though tight does not prevent rotation. This can lead to some polar alignment drift when I am repositioning RA/DEC on the telescope.
  2. The EAF was flakey, probably due to backlash. I had the EAF run only when the temperature changed by more than 2 degC, but when the routine was triggered it really threw off the focus. I had to manually refocus.
  3. The SWSA mount ran out of batteries and I had to change it. This led to some images with lots of star trails.
  4. I had to do a meridian flip from the west side of the mount to the east side. This will lead to some alignment issues in the stacked frames.

2021-07-28

Weather: Mostly Clear

This was yet a better run tonight than any other before. I figured out the issue with the AZ on my mount. It turned out I just needed to screw in the base a little tighter. I set autofocus manually at the beginning of the run and did not change focus since. I expect some loss in clarity due to this, but I did get about 9 hours of imaging time. The batteries lasted all night.

Notes:

2021-07-30

Weather: Clear

Tonight, the weather is amazingly clear. I was surprised because all day it had been cloudy.

For imaging tonight, I decided to switch up filters and utilize my Optolong L-Extreme 2″ on the same target. I am also switching up mounts to the iOptron GEM45 with a Literoc 1.75″ tripod.

Notes:

I am still figuring out this mount. I am having issues with some star trailing (maybe at the meridian flip?), and some cable snags potentially.

Temperature Calibration Tower for Prusslicer

In this post I will show you how to print a temperature tower with Prusslicer. 

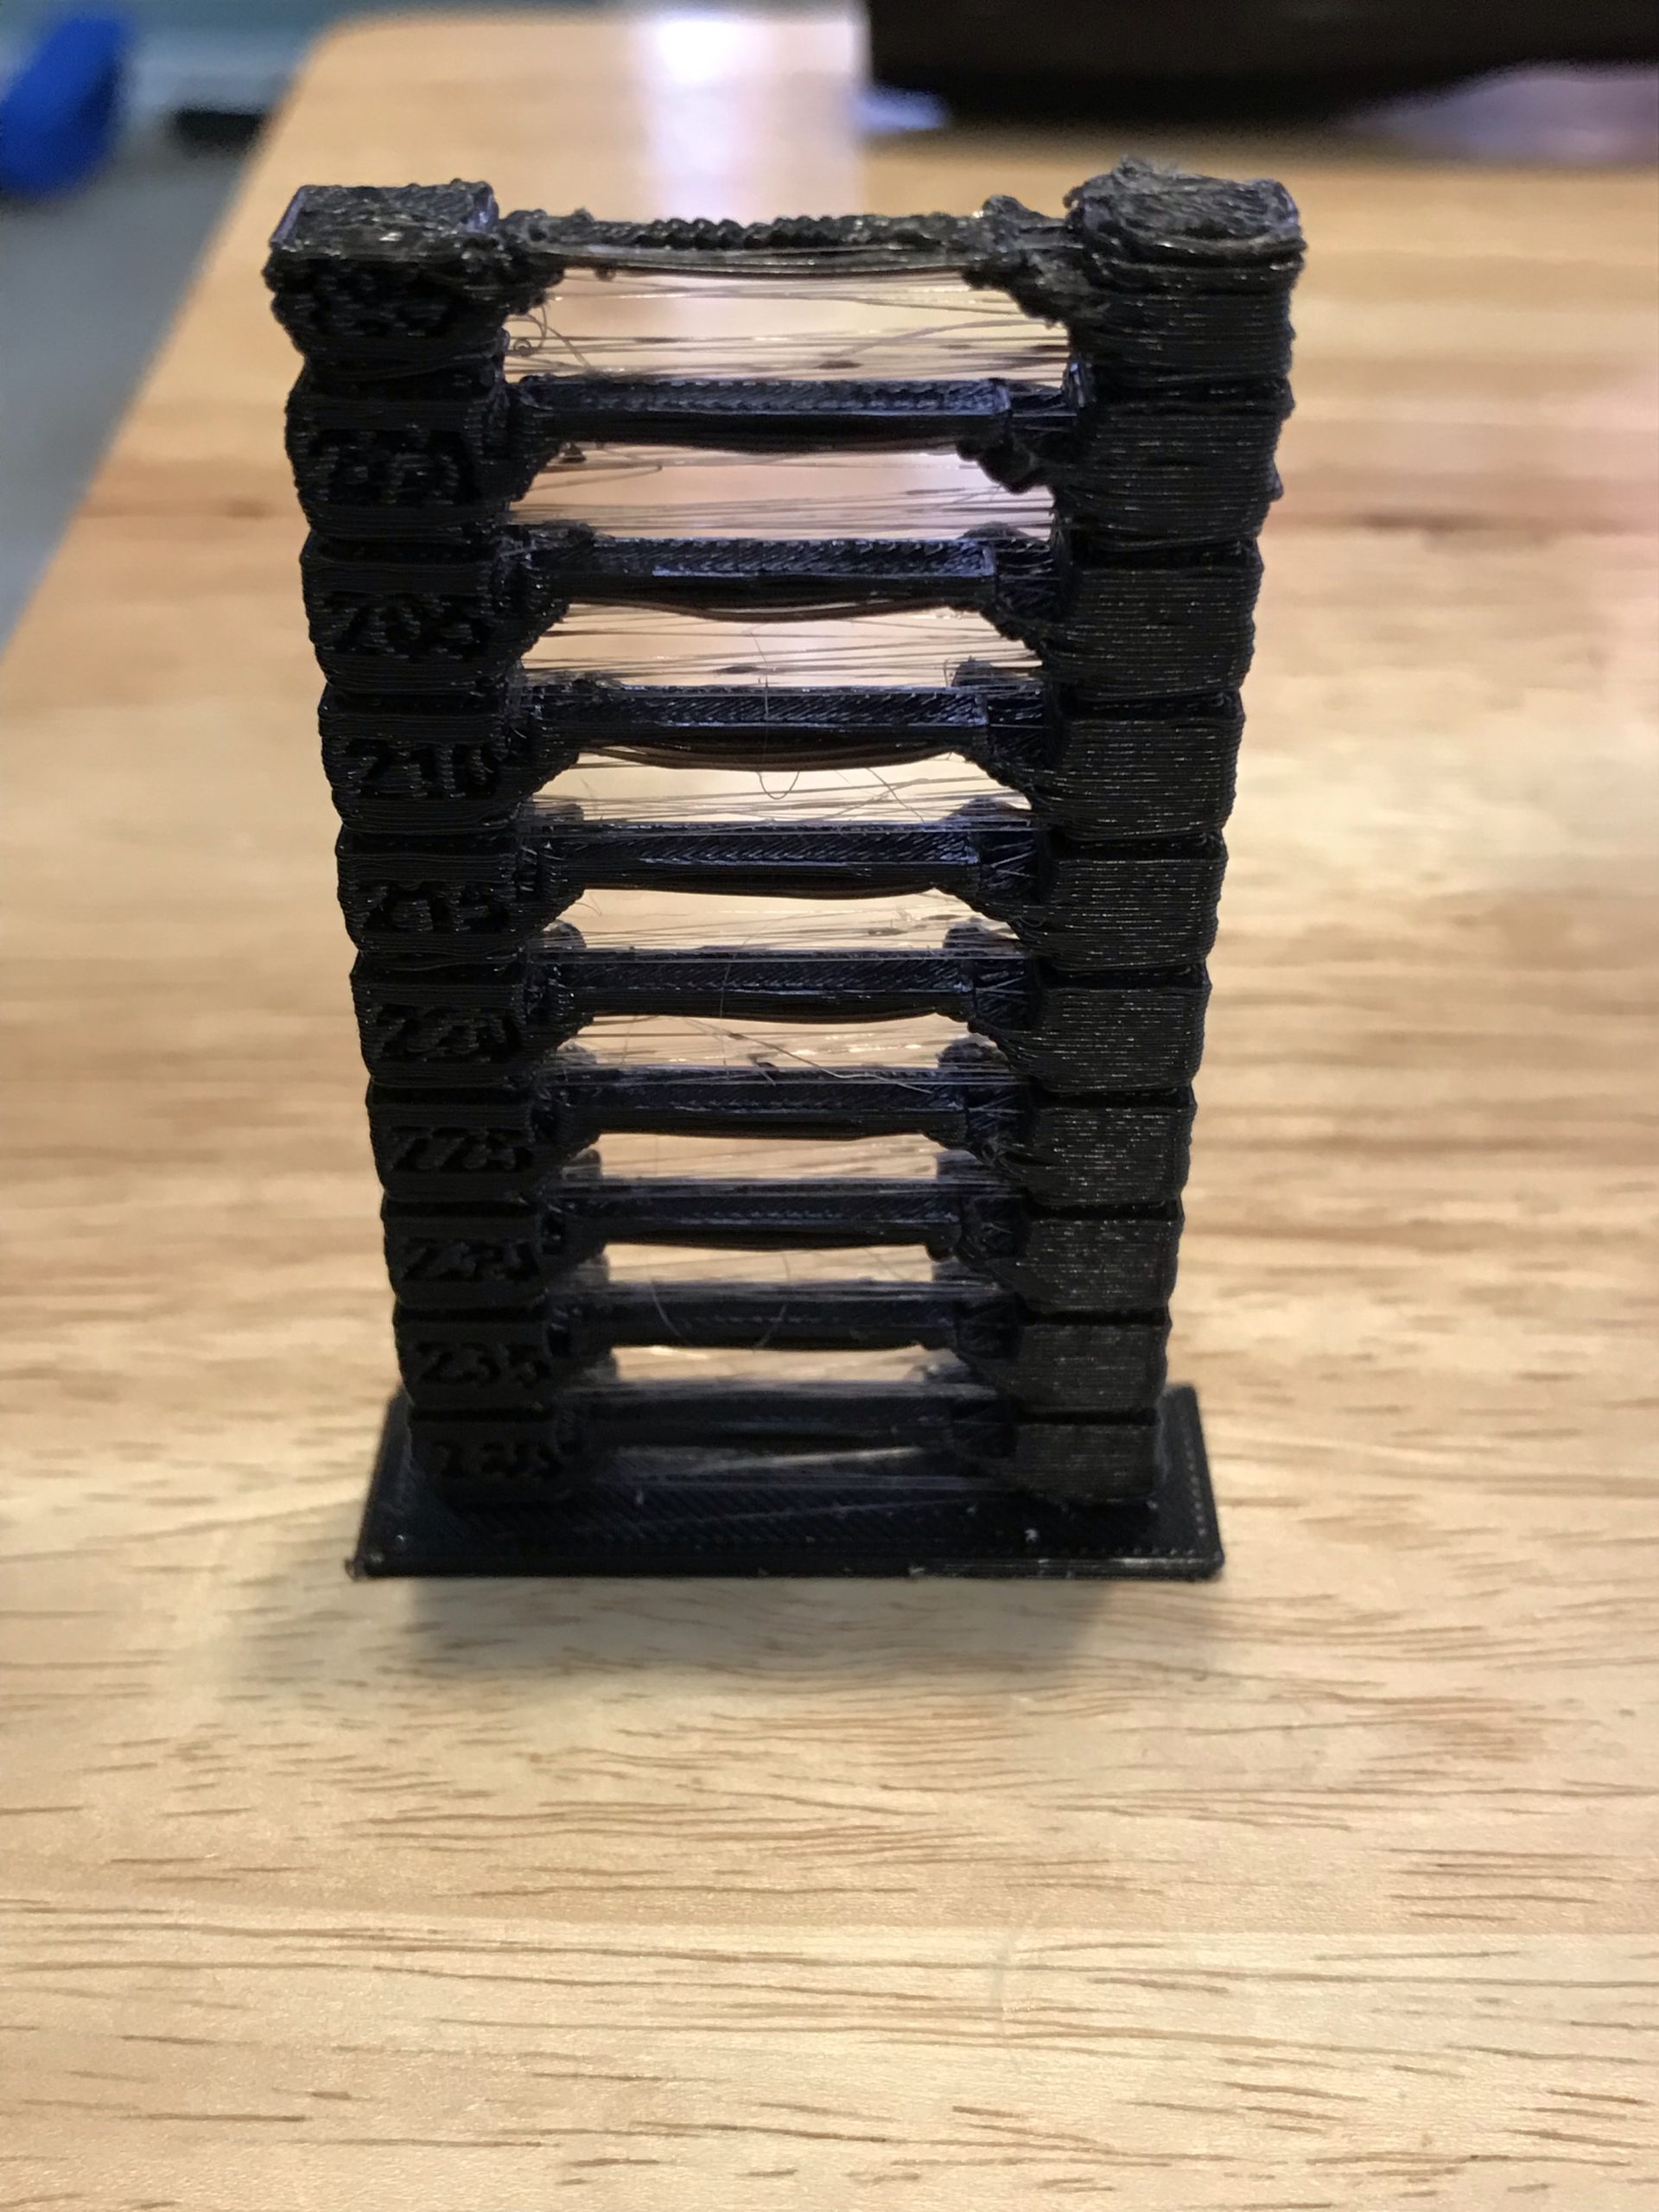
Temperature Calibration Tower

This temperature tower has markings for temperatures in 5 degree increments from 240 C downto 185 C. The printing is done in reverse to prevent cold extrusions (which are bad!!!) if the temperature is too low. Note, I use this temperature tower for PLA with a 0.5 mm nozzle, which requires a higher melt temperature than normal. You may require a different range of temperature for your nozzle, printer, and material. Results may vary, but you can adjust these steps with any model.

Start by downloading the model from the link below.

https://www.thingiverse.com/thing:2625999

Configuring Prusslicer

Load the model in your slicer do a preliminary slice. Use the preview window to identify the layer_z index immediately above the first temperature marking as layer_initial. Next, identify the height between layers as layer_increment. Copy the code snippet below and edit it as necessary, changing the first value for “layer_z<=” value to layer_initial, and then adjusting each subsequent layer by layer_increment. In the example below, layer_initial=9 and layer_increment=7. If necessary, adjust the gcode value to correspond to your temperature tower. In the example below, M104 S240 sets the initial T tower floor to 240C and then increments each layer by 5C until the final layer of 180C.

Copy the code and paste it in Prusslicer at  “Printer Settings->Custom G-Code->Before Layer Change”.

;BEFORE_LAYER_CHANGE
{if layer_z<=9} 
M104 S240 
; T tower floor 1
{elsif layer_z<=16}
; T tower floor 2
M104 S235
{elsif layer_z<=23}
; T tower floor 3
M104 S230
{elsif layer_z<=30}
; T tower floor 4
M104 S225
{elsif layer_z<=37}
; T tower floor 5
M104 S220
{elsif layer_z<=43}
; T tower floor 6
M104 S215
{elsif layer_z<=50}
; T tower floor 7
M104 S210
{elsif layer_z<=57}
; T tower floor 8
M104 S205
{elsif layer_z<=63}
; T tower floor 8
M104 S200
{elsif layer_z<=70}
; T tower floor 8
M104 S195
{elsif layer_z<=77}
; T tower floor 8
M104 S190
{elsif layer_z<=84}
; T tower floor 8
M104 S185
{else}
; T tower floor 9
M104 S180
{endif}

Perform a print with your preferred settings.

Evaluating the Results

Rather than repeating what has been said elsewhere, I will direct you to the following site which has some great tips on how to evaluate the results.

In my case, I found the following:

  • Temperatures below 195 lost adhesion completely.
  • Mechanical tests revealed that a temperature of at least 215 C would be needed. I was able to manually break the bridge and separate layers with temperatures below this.
  • From this point forward, temperatures beyond 220 C showed significant warping on the bridge.
  • All of the temperatures showed stringing which probably is a sign that I need to adjust my retraction settings, or program in a new linear advance value. In this example, I used a linear advance setting of 0 which effectively disables the feature.

In a future post, I discuss calibrating linear advance. I chose this option because Prusslicer only allows adjusting retraction settings on a Per Machine/Extruder basis. I will likely need different settings for each filament, therefore, I will customize the K-Factor for each filament instead.